Decorative Wood Slats on Wall A Design Guide
Decorative wood slats on wall offer a versatile and visually appealing way to enhance any room. From the warm aesthetic of natural wood to the modern flair of painted finishes, slats provide a customizable design element. This guide explores various aspects, including different wood types, design considerations, installation methods, maintenance, and cost analysis, to help you achieve your desired look.
We’ll delve into the nuances of slat width, spacing, and arrangement, examining how lighting and color palettes impact the overall effect. Further, the guide will discuss integrating wood slats with other interior elements and highlight installation methods across different room types. We’ll also offer practical tips for maintaining your slatted wall and addressing potential issues.
Introduction to Decorative Wood Slats on Walls
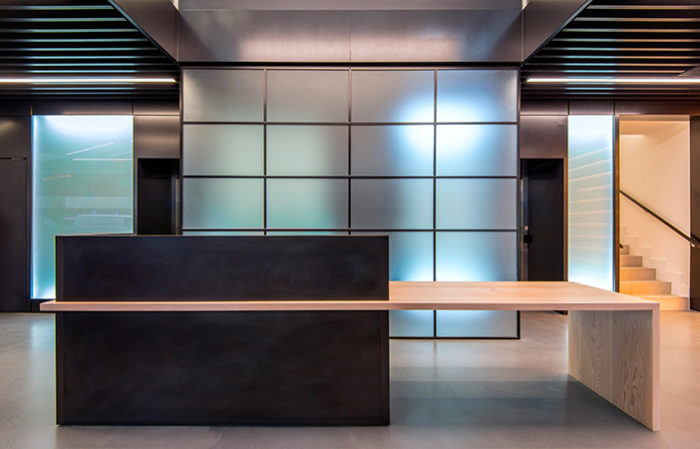
Adding decorative wood slats to walls offers a versatile and aesthetically pleasing way to enhance any space. The natural warmth and texture of wood create a captivating visual interest, and the ability to customize the slats allows for a wide range of design possibilities. This approach is increasingly popular in both residential and commercial settings, transforming plain walls into statement pieces.
The appeal of wood slats on walls extends beyond mere decoration. Their inherent strength and durability, when combined with appropriate finishes, can create a long-lasting and stylish feature. This adaptability allows for the integration of wood slats into various design styles, ranging from rustic and modern to contemporary and industrial.
Types of Wood for Wall Slats
A wide range of wood species can be used for wall slats, each offering unique characteristics. Choosing the right wood depends on the desired aesthetic, budget, and durability needs. Factors such as density, grain patterns, and natural oils play a significant role in the final look and longevity of the slatted wall.
Finishes and Treatments for Wood Slats
Various finishes and treatments can be applied to wood slats, impacting their appearance and protection. These treatments include stains, paints, sealants, and oils, each with its own aesthetic effect and level of protection. Selecting the appropriate finish is crucial for both the visual appeal and the longevity of the slatted wall. A durable finish will also enhance the resistance of the wood to moisture, pests, and fading.
Design Styles Incorporating Wood Slats
Wood slats can be integrated into a variety of design styles. For example, in a rustic design, untreated or lightly stained wood slats with visible knots and variations in grain patterns can create a warm and inviting atmosphere. A contemporary design might utilize a sleek, smooth finish with minimal variation in tone, accentuating the clean lines of the space. The versatility of wood slats allows them to be incorporated seamlessly into different styles, from modern minimalism to traditional elegance.
Comparison of Wood Types for Wall Slats
| Wood Type | Appearance | Durability | Cost |
|---|---|---|---|
| Oak | Rich, warm tones; prominent grain patterns | High; resistant to rot and insect damage | Medium to High |
| Pine | Light, natural tones; relatively straight grain | Moderate; susceptible to moisture damage if not treated | Low to Medium |
| Cedar | Pale yellow-brown hues; aromatic scent | High; naturally resistant to rot and insects | Medium |
The table above provides a general comparison of different wood types. Factors like the specific species within a type, the quality of the wood, and the chosen finishing treatments can influence the final cost and durability. It is essential to carefully consider these factors when making a selection.
Design Considerations
Wood slats offer a versatile design element for walls, allowing for a wide range of aesthetics and atmospheres. Careful consideration of various factors, including slat width, spacing, and arrangement, is crucial for achieving a desired outcome. The interplay of lighting, color palettes, and integration with existing interior design elements further refines the overall impact.
Understanding these factors enables a more informed and effective approach to incorporating wood slats into a space, maximizing their visual appeal and functionality.
Slat Width, Spacing, and Arrangement
The dimensions of wood slats—width and spacing—significantly impact the overall design. Narrower slats, closely spaced, create a more refined and detailed look, while wider slats, farther apart, lend a bolder and more contemporary feel. The arrangement of the slats also affects the design; horizontal slats visually expand the room, while vertical slats offer a more structured and taller impression.
Lighting Impact
Lighting plays a crucial role in enhancing the aesthetic qualities of wood slats. Natural light, particularly sunlight, can highlight the grain and texture of the wood, creating depth and dimension. Strategic placement of artificial lighting, such as spotlights or recessed lighting, can accentuate specific areas or create a warm and inviting ambiance. Consider the interplay of light and shadow cast by the slats, which can dramatically alter the perceived texture and appearance of the wall.
Color Palettes and Mood
The choice of wood color palette significantly influences the overall mood and atmosphere of a room. Light, warm woods like oak or maple evoke a sense of warmth and tranquility. Darker woods like walnut or ebony can create a more dramatic and sophisticated ambiance. The color of the wood can be further enhanced or contrasted by the surrounding color scheme of the room, such as paint colors or other decorative elements.
Integration with Other Elements
Effective integration of wood slats with other interior design elements, such as furniture and flooring, is crucial for a cohesive and harmonious design. Matching or contrasting the wood tones of the slats with the furniture and flooring can create visual harmony. Conversely, using contrasting tones can add visual interest and highlight specific features. Consider the existing style of the room and the desired outcome when choosing furniture and other elements.
Horizontal vs. Vertical Arrangements
Horizontal slat arrangements often create a sense of visual width and openness, suitable for rooms where expansive views are desired. Vertical arrangements, conversely, give a taller impression, suitable for rooms that need to appear more spacious or for rooms with high ceilings. The choice between horizontal and vertical arrangements depends on the specific design goals and the characteristics of the room.
Living Room Layout Example
| Room Area | Slat Direction | Furniture Style | Color Scheme |
|---|---|---|---|
| Wall behind sofa | Vertical | Modern | Light oak slats, light gray walls, beige sofa |
| Accent wall (fireplace) | Horizontal | Contemporary | Dark walnut slats, warm beige walls, black leather furniture |
| Dining area | Horizontal | Mid-century modern | Light maple slats, white walls, natural wood dining set |
This layout exemplifies how wood slats can be integrated into different sections of a living room, each with its own design focus. The combination of different slat directions, furniture styles, and color schemes creates a visually appealing and dynamic space.
Practical Applications and Installation
Wood slat walls offer a versatile and aesthetically pleasing design element. Their installation, while potentially complex, is achievable with the right preparation and technique. Understanding different installation methods and considering the specific area of application are key to a successful project. This section details various installation approaches, essential tools, and crucial considerations for diverse house environments.
Installation Methods
Different installation methods cater to varying project needs and aesthetic preferences. Direct attachment to the wall studs, using adhesive, or a combination of both are viable options. Each method presents distinct advantages and disadvantages, impacting the final look and longevity of the slatted wall.
Tools and Materials
The necessary tools and materials vary depending on the chosen installation method. For a typical installation, expect to need a stud finder, drill, measuring tape, level, screws, wood slats, adhesive, and possibly a saw for cutting the slats to size. Safety gear, such as safety glasses and work gloves, is crucial.
Installation Process – Direct Attachment
This method involves directly securing the wood slats to the wall studs using screws.
- Locate wall studs using a stud finder.
- Mark the stud locations on the wall.
- Pre-drill pilot holes in the wood slats to prevent splitting.
- Secure the slats to the studs using appropriate screws.
- Ensure the slats are level and aligned.
- Caulk any gaps or imperfections.
Installation Process – Adhesive Application
This approach employs specialized adhesive for a more seamless look. It is ideal for areas where the wall is not structurally sound or when a more modern, minimalist aesthetic is desired.
- Clean the wall surface thoroughly to remove dust and debris.
- Apply a thin layer of adhesive to the back of the wood slats.
- Carefully position the slats on the wall, ensuring proper alignment.
- Press firmly to ensure a good bond.
- Apply additional adhesive if needed for a more secure attachment.
- Allow sufficient drying time as specified by the adhesive manufacturer.
Considerations for Different Areas
The choice of installation method and materials should align with the specific area’s conditions and moisture levels.
- Bathrooms: Select moisture-resistant wood slats and ensure proper sealing of joints and edges to prevent water damage. Consider using a waterproof adhesive and sealant.
- Kitchens: Use moisture-resistant wood or consider a sealant for surfaces exposed to water or moisture.
Installing a Simple Slatted Wall in a Bedroom
This example focuses on the direct attachment method.
- Planning: Measure the wall area and calculate the number of slats needed, accounting for overlaps.
- Stud Finding: Locate the wall studs and mark them on the wall using a pencil.
- Cutting and Preparation: Cut the wood slats to the desired length. Pre-drill pilot holes in the slats.
- Attachment: Align the slats with the marked studs and secure them using appropriate screws. Ensure the slats are level and aligned.
- Finishing Touches: Caulk any gaps or imperfections between the slats and the wall. Sand the caulk to smooth the surface if necessary.
Maintenance and Durability
Maintaining the aesthetic appeal and structural integrity of wood slat walls requires proactive care. Proper upkeep prevents damage from moisture, pests, and wear and tear, extending the lifespan of the installation. Understanding the specific needs of different wood types is crucial for achieving long-term success.
Wood Type Longevity
The longevity of wood slats depends heavily on the species. Hardwoods, such as oak, maple, and teak, are generally more durable than softwoods like pine or fir. Hardwoods resist warping, cracking, and rot better due to their denser structure. While softwoods are often more affordable, they may require more frequent maintenance and have a shorter lifespan in exterior or high-moisture environments. For example, cedar, a softwood, is known for its natural resistance to rot and insects, making it suitable for exterior applications. Consult with a local lumberyard or building supplier for guidance on the most suitable wood type for your specific needs and location.
Moisture Management
Preventing moisture damage is paramount. Wood is hygroscopic, meaning it absorbs and releases moisture from the surrounding environment. Fluctuations in humidity can cause warping, cracking, and even rot. Regularly inspecting the slats for signs of moisture damage, such as discoloration or swelling, is essential. Proper ventilation is critical to avoid moisture buildup behind the slats. Consider installing a moisture barrier behind the slats to minimize the risk of water damage.
Pest Prevention, Decorative wood slats on wall
Wood-destroying insects, like termites and carpenter ants, can pose a significant threat to wooden slats. Regular inspections for signs of insect activity are crucial. Professional pest control treatments may be necessary if infestation is detected. Using wood preservatives during installation can significantly reduce the risk of pest damage. Choosing wood species naturally resistant to pests, such as cedar, can also be beneficial.
Maintenance Practices
Regular cleaning and preventative maintenance are key to maintaining the appearance and longevity of slatted walls. Dust and debris accumulation can affect the aesthetic appeal. Use a soft-bristled brush or vacuum to remove dust and dirt from the slats. Occasional washing with a mild soap solution and water (avoid harsh chemicals) can remove surface grime. For exterior installations, consider using a water-repellent sealant to protect the wood from moisture. This can help extend the life of the slats, particularly in high-humidity or rainy areas.
Repair and Replacement
Repairing or replacing damaged slats depends on the extent of the damage. Minor scratches or surface damage can often be addressed with wood filler or touch-up paint. For more significant damage, like cracks or splinters, the damaged slat should be replaced. Carefully match the new slat with the existing ones in terms of color and wood type to maintain the aesthetic consistency of the wall. Use appropriate fasteners and ensure proper alignment to maintain the integrity of the installation.
Common Problems and Solutions
| Problem | Cause | Solution | Prevention |
|---|---|---|---|
| Warped slats | Fluctuations in humidity, improper drying of wood | Repair with wood filler or replace. Consider adjusting moisture control in the area. | Use moisture-resistant wood or add a moisture barrier. |
| Pest infestation | Presence of insects or rodents | Professional pest control treatment, replacement of affected slats. | Regular inspections, use of wood preservatives, pest-resistant wood types. |
| Moisture damage | Water penetration, high humidity | Repair or replace damaged slats. Improve ventilation and moisture control. | Proper installation with moisture barriers, good ventilation. |
| Loose slats | Faulty installation, movement in the wall | Tighten or secure loose fasteners, replace damaged mounting areas. | Proper fastening and support during installation. |
Cost Analysis and Budget
Budgeting for a slatted wall project is crucial to ensure the project stays within financial constraints and allows for desired materials and installation quality. Understanding the various cost components, from material acquisition to labor expenses, is essential for a successful project. This section details the costs associated with implementing a slatted wall, providing cost-effective strategies, and outlining budget options for different slat types and installation methods. A detailed cost estimate for a medium-sized room project will also be presented.
Material Costs
The cost of wood slats varies significantly based on the type of wood, its quality, and the desired finish. Common choices include pine, cedar, oak, and bamboo, each offering unique aesthetic qualities and price points. Reclaimed wood, while often more expensive per board foot, can provide a distinctive character and adds to the project’s overall cost.
Labor Costs
Labor costs depend on the complexity of the installation, the size of the project, and the expertise of the hired installers. Simple slat installations might require just a few hours of work, while more intricate designs with specialized cuts or finishing touches may take longer and increase the overall labor cost. Professional installation is recommended for ensuring structural integrity and a finished look.
Installation Costs
Installation costs are impacted by the complexity of the design and the necessary tools and equipment. A simple, straightforward installation using pre-cut slats will be less expensive than a project requiring custom cuts or specialized techniques. Adding hardware, such as brackets or supports, will also contribute to the installation cost.
Cost-Effective Strategies
Several strategies can help keep costs down without compromising the desired aesthetic. Selecting a more affordable wood type like pine or choosing pre-cut slats can significantly reduce material costs. Doing some of the preparatory work, like measuring and cutting, yourself can lessen labor costs. Alternatively, opting for a simpler installation style, like horizontal slats, can minimize the need for specialized tools or techniques.
Budget Options
Budget options for slatted walls vary greatly depending on the desired look and the type of wood used. A budget-friendly option might involve using pine slats and a simpler installation, while a higher-end look could feature more expensive hardwoods and a complex, customized installation. Consider your budget and design preferences when making your selection.
Cost Estimate for a Medium-Sized Room
| Item | Quantity | Unit Price | Total Cost |
|---|---|---|---|
| Wood Slats (Pine) | 100 | $2.50 | $250.00 |
| Wood Slats (Pine) | 100 | $2.50 | $250.00 |
| Brackets | 50 | $0.50 | $25.00 |
| Primer | 1 | $20.00 | $20.00 |
| Paint (2 coats) | 1 | $30.00 | $30.00 |
| Labor (4 hours) | 1 | $50.00/hour | $200.00 |
| Total | $800.00 |
Note: This is a sample estimate and may vary depending on specific project requirements and local costs.
Inspirational Images and Visual References
Source: walmartimages.com
A visual journey through various wood slat wall installations can greatly aid in understanding their design potential. Images provide tangible examples, illustrating the diverse aesthetics and practical applications achievable with this material. They highlight the versatility of slatted walls, showcasing them in different interior design styles and showcasing the impact of various lighting and color palettes.
A rich visual library allows for a deeper appreciation of the material’s potential. Seeing the variety of installations, from modern minimalist designs to rustic farmhouse styles, inspires creativity and fuels design decisions.
Different Design Styles and Aesthetics
Visual examples demonstrate the adaptability of slatted walls across diverse interior design styles. The material’s natural warmth and texture work well in both contemporary and traditional spaces.
- Modern Minimalism: Images featuring sleek, monochromatic slatted walls with minimalist furnishings highlight the clean lines and modern aesthetic. The lighting is often strategically placed to accentuate the slats’ subtle contours, emphasizing the wall’s architectural element. The palette typically includes shades of white, gray, or light wood tones. The overall effect is clean, uncluttered, and sophisticated.
- Rustic Farmhouse: Rustic farmhouse-style installations showcase the natural beauty of the wood. The slats are often wider and more substantial, with a visible grain pattern. Warm, neutral color palettes, like creams, browns, and beige, complement the wood’s natural tones. Often, the lighting is soft and ambient, highlighting the wood’s warmth and texture. The overall effect is inviting, cozy, and comforting.
- Coastal/Beachy Style: A light-toned wood, often a pale white or light gray, is used in a coastal or beachy design. The slatted walls often feature a relaxed, airy feel, achieved through the use of light colors and natural materials. The lighting in these spaces tends to be bright and airy, mimicking natural daylight. The overall effect is tranquil, refreshing, and reminiscent of the beach.
- Bohemian Chic: Bohemian chic interiors showcase slatted walls with vibrant color palettes and eclectic furnishings. The wood slats can be painted in bold colors or have natural color variations. The lighting is often layered, creating depth and dimension in the space. The overall effect is playful, free-spirited, and full of personality.
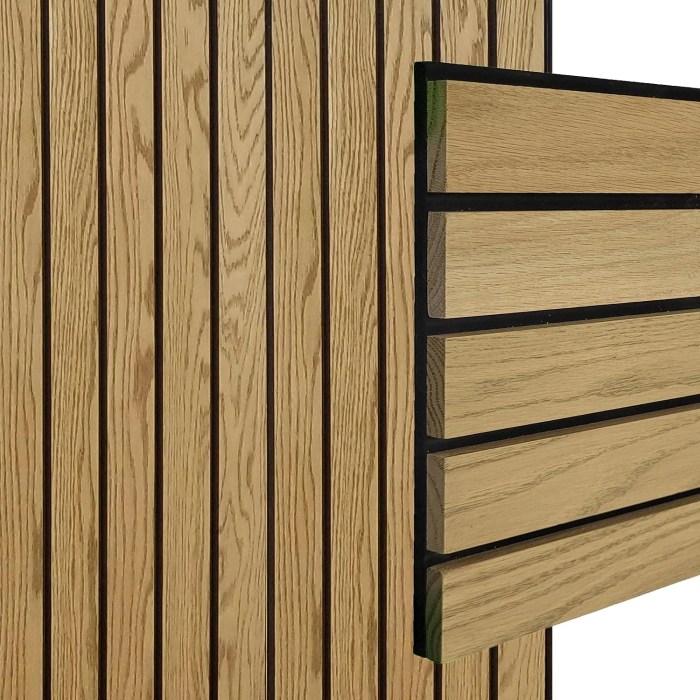
Types of Wood Slats and Their Visual Impact
Different types of wood, including cedar, pine, oak, and bamboo, exhibit distinct visual characteristics. The choice of wood significantly influences the overall aesthetic.
- Cedar: Cedar’s reddish-brown tones and subtle grain pattern create a warm, inviting atmosphere. Its inherent durability and resistance to rot make it a practical choice for exterior and interior slatted walls. The overall effect is rustic, inviting, and natural.
- Pine: Pine’s lighter color palette, often with a noticeable grain pattern, lends a natural and rustic feel to the space. It is relatively affordable and easy to work with. The overall effect is approachable and natural.
- Oak: Oak’s rich, dark brown tones and pronounced grain patterns create a sophisticated and enduring impression. The durability of oak makes it a suitable option for high-traffic areas. The overall effect is classic, robust, and sophisticated.
- Bamboo: Bamboo’s unique striped pattern and light color create a modern and minimalist effect. Its sustainable nature is a plus for environmentally conscious design. The overall effect is minimalist, stylish, and eco-friendly.
Lighting and Color Palettes
The interplay of lighting and color palettes dramatically impacts the perceived ambiance of slatted wall installations. Well-chosen lighting accentuates the wood’s texture and enhances the overall design.
- Ambient Lighting: Soft, ambient lighting, like recessed lighting or warm-toned lamps, enhances the wood’s natural beauty and creates a cozy atmosphere. This type of lighting is often used in spaces aiming for a relaxed or intimate feel.
- Accent Lighting: Strategic use of accent lighting, like spotlights or track lighting, highlights the architectural details of the slatted wall and adds depth to the design. This is useful in modern or contemporary settings.
- Color Palettes: Color palettes range from neutral and calming to bold and vibrant. The color palette should complement the wood’s natural tones and the overall design style of the space. For example, a white-washed slatted wall with a neutral color palette can create a bright and airy space. A dark wood slatted wall can create a dramatic or intimate feel.
Final Thoughts
In conclusion, decorative wood slats on wall provide a unique and impactful way to personalize your space. This comprehensive guide has explored the aesthetic possibilities, design considerations, practical aspects, and cost analysis involved. By considering the various factors presented, you can confidently embark on your project and create a truly distinctive and enduring design element in your home.