Get Water Out of Toilet A Comprehensive Guide
Get water out of toilet – a common plumbing problem that can quickly become frustrating. This guide provides a thorough walkthrough of identifying, diagnosing, and fixing various water issues in your toilet. From overflows to continuous leaks, we’ll explore the causes, solutions, and preventative measures to ensure your toilet functions smoothly and efficiently.
This comprehensive guide covers everything from pinpointing the source of the water problem to implementing effective solutions, including troubleshooting clogs, leaks, and faulty components. We’ll also discuss preventative maintenance to avoid future issues.
Identifying the Problem
Toilet water issues can range from minor annoyances to major plumbing emergencies. Understanding the various scenarios and their causes is crucial for effective troubleshooting and preventing further complications. Proper identification of the problem is the first step in resolving water buildup in your toilet.
Water Buildup Scenarios
Water accumulating in a toilet can manifest in several ways, each with its own set of potential causes. Overflow, leaks, and continuous water flow are common issues. Understanding these distinct scenarios is essential to determine the appropriate course of action.
Types of Water Buildup Issues
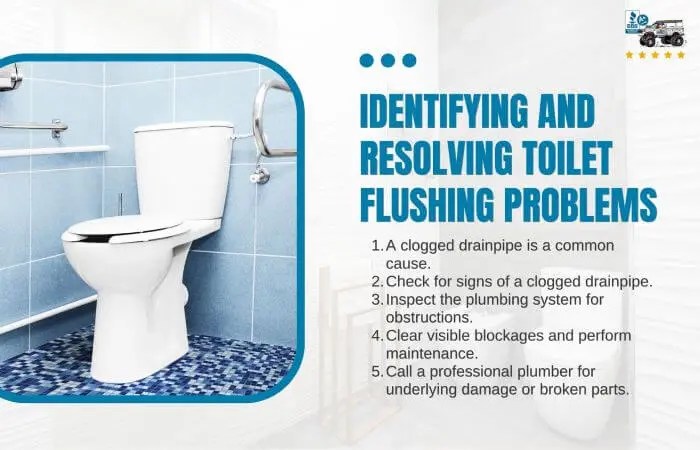
- Overflow: Water rising above the rim of the toilet bowl, potentially overflowing onto the floor, is a clear sign of a blockage. This often results from a clog in the drain or vent pipe, preventing proper drainage. A faulty or improperly installed wax seal can also lead to overflow.
- Continuous Water Flow: A continuous flow of water from the tank to the bowl indicates a malfunction in the toilet’s mechanism. Loose fill valves, faulty flappers, or blockages in the supply line are common culprits.
- Leaks: Dripping water or a slow leak from the tank to the bowl can indicate a damaged pipe, a loose connection, or a crack in the tank itself. These leaks can lead to significant water waste over time.
Causes of Water Buildup Issues
Various factors can contribute to water buildup problems in a toilet. Faulty components, obstructions, and plumbing issues are common causes.
- Faulty Parts: A malfunctioning fill valve, flapper, or other internal components can disrupt the proper operation of the toilet, leading to overflow, leaks, or continuous water flow. A worn-out flapper, for example, might not seal properly, causing a constant leak from the tank to the bowl.
- Clogged Drains: Solid waste, debris, or foreign objects accumulating in the drain can prevent proper water drainage, leading to overflow. This is a common cause of toilet problems.
- Plumbing Problems: Issues with the underlying plumbing system, such as damaged pipes or loose connections, can cause leaks, impacting the entire system and potentially affecting other fixtures. A crack in the drain pipe can allow water to seep through the pipes, causing a leak in the toilet tank.
Common Toilet Water Problems
The following table Artikels common toilet water problems, their potential causes, and their associated symptoms. This information aids in accurate diagnosis and subsequent troubleshooting.
| Problem Type | Potential Causes | Symptoms |
|---|---|---|
| Overflow | Clogged drain, blocked vent, faulty seal | Water rising above the rim, spilling over the bowl |
| Continuous Water Flow | Loose fill valve, faulty flapper, clogged supply line | Water continuously running from the tank into the bowl |
| Leaks | Damaged pipes, loose connections, cracked tank | Dripping water, slow leak from tank to bowl |
Assessment and Diagnosis
Source: saymedia-content.com
Pinpointing the source of a toilet’s water problem requires a systematic approach, moving from general observations to specific checks. A methodical investigation helps to identify the root cause and facilitates efficient troubleshooting. This process ensures a swift resolution to the problem, minimizing disruptions and costs.
Systematic Approach to Assess the Source
A systematic approach involves progressively narrowing down the possible causes of the water issue. Begin by visually inspecting the toilet for any obvious signs of leaks or water buildup. This initial assessment provides valuable clues that can guide the subsequent diagnostic procedures. Subsequent checks focus on specific components and connections.
Procedure for Diagnosing a Toilet Water Issue
The diagnostic procedure involves a series of checks, starting with basic observations and gradually progressing to more technical inspections. Initial observations include checking for visible leaks, water stains, or unusual water levels. This initial assessment helps to quickly identify the general location of the problem. The procedure then progresses to more specific checks on supply lines, drain lines, and the tank itself.
Identifying the Specific Location and Nature of the Water Problem
Identifying the precise location and nature of the water issue is critical for effective troubleshooting. Water accumulating around the base of the toilet suggests potential problems with the drain or the wax ring. Water pooling in the tank typically indicates a problem with the fill valve, flapper, or overflow tube. Careful observation of water flow and any unusual sounds can provide further clues.
Diagnostic Tools and Techniques
Various tools and techniques can assist in diagnosing toilet leaks or water buildup. A flashlight or mirror can help to examine hard-to-reach areas, while a bucket can assist in detecting leaks. A leak detector can pinpoint the exact location of water leaks, often invisible to the naked eye. Using these tools, you can identify and pinpoint specific components where water might be leaking or accumulating.
Checking for Clogs or Blockages
Checking for clogs or blockages in the drain and supply lines is crucial. A plunger can be used to dislodge clogs in the toilet bowl. A snake or drain auger can clear blockages in the drain line. Inspection of the supply lines for kinks or restrictions helps identify blockages. Using a combination of visual inspection and tools like plungers or drain snakes can effectively address potential clogs.
Example Diagnostic Flowchart
| Step | Action | Possible Indication |
|---|---|---|
| 1 | Visual inspection of the toilet | Visible leaks, water stains, or unusual water levels |
| 2 | Check the fill valve and flapper | Water in the tank, slow fill rate |
| 3 | Inspect the drain line and wax ring | Water around the base, slow draining |
| 4 | Use a leak detector | Pinpoints the exact leak location |
Troubleshooting and Solutions
Toilet water problems can range from minor annoyances to major plumbing issues. Understanding the common causes and solutions can save you time, money, and potential headaches. This section provides a comprehensive guide to troubleshoot and resolve various toilet water problems.
Effective troubleshooting involves a systematic approach. First, identify the specific problem. Is the toilet overflowing, not flushing properly, or constantly running? Second, assess the potential causes. Is there a blockage, a malfunctioning valve, or a leak? Finally, employ appropriate solutions. The following sections detail common solutions and step-by-step instructions for resolving these issues.
Common Toilet Water Problems and Solutions
Diagnosing the root cause of toilet water problems is crucial for effective solutions. A variety of factors can contribute to these problems, including clogged drains, faulty valves, or leaks in the plumbing system. The following table provides a summary of common toilet problems and their potential solutions.
| Problem | Possible Causes | Solutions |
|---|---|---|
| Toilet overflows | Full tank, clogged drain, faulty fill valve, or a leak in the drain line | Check for blockages, ensure the fill valve is functioning correctly, and look for leaks. |
| Toilet won’t flush | Clogged drain, malfunctioning flapper valve, or a blockage in the drain line | Clear the drain, replace the flapper, or address blockages in the drain line. |
| Toilet runs constantly | Faulty flapper valve, fill valve, or a leak in the drain line | Replace the flapper, adjust or replace the fill valve, or fix the leak. |
Replacing a Flapper Valve
A flapper valve is a crucial component in a toilet’s flushing mechanism. A faulty flapper valve can cause a toilet to run continuously or not flush properly. Replacing a flapper valve is a straightforward process that typically involves the following steps:
- Turn off the water supply to the toilet. Locate the shut-off valve beneath the toilet tank and turn it clockwise to stop the water flow.
- Flush the toilet to drain any remaining water in the tank.
- Carefully remove the old flapper valve. This usually involves lifting the flapper out of its mounting.
- Inspect the mounting area for any debris. Clean any dirt or clogs in the tank.
- Install the new flapper valve, ensuring it fits snugly into the mounting.
- Turn the water supply back on and test the toilet to confirm proper functionality.
Replacing a Fill Valve
A fill valve is responsible for replenishing the water in the toilet tank after each flush. A faulty fill valve can lead to a continuously running toilet. Here’s how to replace a fill valve:
- Turn off the water supply to the toilet tank. Locate the shut-off valve beneath the tank and turn it clockwise.
- Flush the toilet to drain the remaining water.
- Disconnect the supply line from the fill valve.
- Carefully remove the old fill valve from the tank.
- Install the new fill valve, making sure to connect the supply line securely.
- Turn the water supply back on and check for leaks. Adjust the water level in the tank as needed.
Troubleshooting a Clogged Toilet Drain
A clogged drain can prevent the toilet from flushing properly. Here’s a systematic approach to clearing a clogged drain:
- Use a plunger to dislodge the clog. A plunger creates suction to dislodge the blockage.
- Try using a drain snake or auger to clear the blockage. A drain snake is a flexible tool that reaches into the drain line to remove obstructions.
- If the clog persists, consider calling a plumber. Severe clogs may require professional intervention.
Prevention and Maintenance
Proper toilet maintenance is crucial for preventing future water issues and ensuring long-term functionality. Ignoring simple preventative measures can lead to costly repairs and inconvenience. This section Artikels key strategies for preventing water problems and maintaining your toilet’s optimal performance.
Maintaining a well-functioning toilet involves proactive measures rather than reactive fixes. Regular inspections and preventative actions can dramatically reduce the likelihood of costly repairs and extended downtime.
Regular Inspection Checklist
A regular inspection routine helps identify potential problems early. Addressing minor issues before they escalate saves time and money. This structured approach minimizes the risk of plumbing issues and ensures consistent toilet performance.
- Visual Inspection of the Tank: Check for leaks around the fill valve, overflow tube, and the tank’s base. Look for any cracks or damage. Inspect the float mechanism for proper operation and the water level to ensure it is appropriate for your toilet model.
- Flush Valve Functionality: Verify that the flush valve operates smoothly and completely closes. A sticking or leaking valve can lead to inefficient flushing and potential leaks.
- Supply Line Condition: Examine the supply line for any kinks, cracks, or signs of corrosion. A compromised supply line can cause low water pressure or leaks. Check for any loose connections.
- Check the Trap: Verify that the trap (the U-shaped pipe) is full of water. This water seal prevents sewer gases from entering your home. A low water level in the trap could indicate a blockage or a leak.
- Drain Line Inspection: Inspect the drain line for clogs or blockages. Unusual sounds or slow draining indicate potential issues. Be aware of foreign objects or materials that might have entered the drain line.
Preventing Clogs and Blockages
Avoiding clogs and blockages is crucial for maintaining efficient toilet operation. Understanding what materials can contribute to these problems can help you proactively prevent them. Proactive measures are often more effective than reacting to a problem after it has already occurred.
- Proper Waste Disposal: Avoid flushing items that are not specifically designed for toilets, such as sanitary napkins, diapers, or excessive amounts of paper towels. These items can cause blockages.
- Regular Cleaning: Regular cleaning of the toilet bowl, especially the trap and drain line, can prevent clogs from accumulating over time. Accumulation of debris is a common cause of blockages.
- Maintenance of the Trap: Ensuring the trap is properly sealed prevents sewer gases from entering your home. This is an essential aspect of preventative maintenance.
- Avoiding Overloading the Toilet: Avoid flushing excessive amounts of waste at one time. Overloading can lead to blockages.
Maintenance Schedule
A proactive maintenance schedule helps you stay ahead of potential issues. Regular inspections and maintenance tasks are key to avoiding unexpected and costly repairs. Scheduling these tasks can reduce the likelihood of major problems.
- Monthly Inspection: A monthly inspection routine should focus on visual checks of the tank, flush valve, and supply line for any signs of leaks or damage.
- Quarterly Cleaning: A quarterly cleaning should include thorough cleaning of the toilet bowl, trap, and drain line, removing any accumulated debris.
- Annual Deep Clean: An annual deep clean should include a more detailed inspection of all components, addressing potential issues before they escalate.
Safety Precautions
Working on a toilet can involve potential hazards, particularly if not approached with caution. Understanding and adhering to safety precautions minimizes the risk of injury and damage to property. A proactive approach to safety is crucial for a successful and safe repair.
Proper safety procedures are essential when dealing with water damage or plumbing issues. Neglecting safety measures can lead to electric shocks, falls, chemical exposure, or worse. Ignoring these precautions can cause significant problems, both in terms of personal safety and the potential for costly damage.
Potential Hazards of Water Damage and Plumbing Issues
Water damage and plumbing problems can lead to various hazards. Electrical components within the plumbing system or the home’s wiring can be exposed to water, causing electrocution. Flooding can lead to falls and slips, potentially resulting in injuries. Improper handling of chemicals used in plumbing can lead to skin or eye irritation. Leaks and overflows can damage flooring, walls, and other household items. Knowing these potential hazards is the first step in minimizing risks.
Importance of Turning Off the Water Supply
Turning off the water supply before working on a toilet is paramount. This prevents accidental flooding, a common hazard. Water damage can cause significant problems, leading to costly repairs and potential health concerns. It’s vital to ensure the water supply is completely shut off before beginning any repairs or maintenance tasks. This simple step can prevent major problems and ensure a safe working environment.
Proper Tools and Protective Gear
Using appropriate tools and protective gear is critical for safe toilet repairs. Improper tools can cause injury, while inadequate protective gear can expose individuals to hazards. For instance, using the wrong wrench can damage pipes, and neglecting safety glasses can result in eye injuries. Ensuring you have the right tools and protective gear is essential for safe and effective repairs. A checklist of required tools and safety equipment should be developed and used before commencing any work. Safety glasses, work gloves, and rubber boots are important protective measures to prevent injuries.
Safety Measures for Water-Related Issues
Following these safety measures when handling water-related issues is crucial:
- Always shut off the water supply to the toilet before starting any work.
- Inspect the area for any potential hazards, such as slippery surfaces or exposed wires.
- Wear appropriate protective gear, including safety glasses, gloves, and rubber boots.
- Use caution when handling chemicals or cleaning solutions.
- Be aware of the potential for electrical hazards, and avoid contact with exposed wires.
- If you are uncomfortable with any aspect of the repair, consult a qualified plumber.
Following these safety precautions can prevent serious injuries and ensure the safety of everyone involved in the repair process.
Visual Aids and Illustrations: Get Water Out Of Toilet
Visual aids are crucial for understanding the intricacies of toilet plumbing. Clear diagrams and illustrations help visualize the components and their interactions, enabling a more effective troubleshooting process. These aids provide a tangible representation of the various parts, connections, and potential issues, making complex concepts more accessible.
Detailed visualizations of toilet parts, especially those associated with water flow, facilitate a better grasp of the system’s operation. This helps in identifying the source of a problem, and applying the right troubleshooting solutions. Illustrative diagrams of troubleshooting steps demonstrate the process visually, enhancing understanding and promoting efficient problem-solving.
Toilet Components Related to Water Flow
Understanding the water flow system within a toilet is key to identifying issues. A toilet’s water flow relies on several components working together. The most important ones are the tank, the fill valve, the flapper valve, and the overflow tube.
- The toilet tank houses the water supply and controls the amount of water released into the bowl. It’s often a rectangular or cylindrical reservoir, usually made of porcelain or plastic.
- The fill valve is a crucial component that regulates the water level in the tank. It opens to fill the tank to the correct level, and then automatically closes to prevent overflow.
- The flapper valve (or ballcock) is situated at the bottom of the tank, controlling the release of water from the tank into the bowl. It operates by a simple mechanism that opens and closes to release water as needed. It’s often made of rubber or plastic.
- The overflow tube prevents the tank from overflowing. If the fill valve malfunctions, water will rise and eventually flow out of the overflow tube, preventing damage to the floor or fixtures.
Troubleshooting Steps Diagram, Get water out of toilet
Visualizing the troubleshooting process can significantly enhance understanding. A diagram outlining the steps can serve as a practical guide.
- A diagram should start with the user checking the water level in the tank. The next step involves checking the fill valve and flapper valve for any obstructions or malfunctions.
- The diagram should then show the user checking the supply line for any kinks or leaks. The diagram should visually guide the user to inspecting the drain pipe for blockages or clogs.
- Finally, the diagram should Artikel checking the overflow tube for proper operation and ensuring there are no clogs.
Common Toilet Problems and Solutions
Illustrating common problems and their solutions will be invaluable in the troubleshooting process.
| Problem | Description | Solution |
|---|---|---|
| Low Water Level in Tank | Water doesn’t fill to the correct level, causing the flush to be ineffective. | Inspect the fill valve for clogs or blockages, and replace if necessary. Verify the supply line is functioning properly. |
| Running Toilet | The toilet constantly flushes or fills. | Check for a leak or malfunction in the fill valve or flapper. Verify the flapper is sealed correctly and not damaged. |
| Clogged Toilet | Toilet water doesn’t drain properly. | Use a plunger to dislodge the clog. If the clog persists, consider using a plumbing snake to clear the drain line. |
Identifying Connections and Valves
A diagram highlighting different types of connections and valves is essential.
- The supply line connection to the fill valve should be visually distinguished in the diagram, indicating how to identify different connection types. Show how to identify the shutoff valve for the toilet.
- The diagram should also show the connections between the tank and the bowl, focusing on the flapper valve mechanism and its operation. Show the overflow tube and its position in the tank.
Internal Plumbing Diagram
A detailed diagram of a toilet’s internal plumbing is helpful for understanding the system’s complexities.
A detailed diagram would illustrate the tank, fill valve, flapper valve, overflow tube, supply line, and drain line, showcasing their connections. It would also indicate the water flow path from the tank to the bowl and into the drain system.
Outcome Summary
In conclusion, resolving toilet water problems is achievable with the right knowledge and approach. By understanding the potential causes, using effective diagnostic techniques, and implementing appropriate solutions, you can efficiently tackle these issues. Remember to prioritize safety precautions throughout the process and consider preventative measures to keep your toilet in optimal working condition for years to come.